
You worked hard to build your website. You spent time choosing the right design, writing your content, setting up your pages, and making everything look professional. Then one day, a visitor messages you to say that your website is showing a “Not Secure” warning in their browser. Or maybe you noticed it yourself, a small but alarming label sitting right next to your website address at the top of the screen.
That little warning carries a lot of weight. For most visitors, seeing “Not Secure” next to a website address is enough to make them close the tab immediately. It signals danger, distrust, and unprofessionalism, even if your website is perfectly safe and well-intentioned. And in today’s online environment, where customers are more aware of digital security than ever before, a “Not Secure” warning is not something you can afford to ignore or put off fixing.
The good news is that this problem is completely fixable. It does not require advanced technical knowledge, and in most cases, it does not cost anything at all. This guide is going to walk you through exactly what causes the “Not Secure” warning, how to fix it step by step, and how to make sure it never comes back.
What Does the “Not Secure” Warning Actually Mean?
Before jumping into the fix, it helps to understand what is actually triggering that warning in the first place.
When you visit a website, your browser and the website’s server communicate by exchanging data back and forth. This data includes everything from the page content you see to any information you type into forms, such as your name, email address, or payment details.
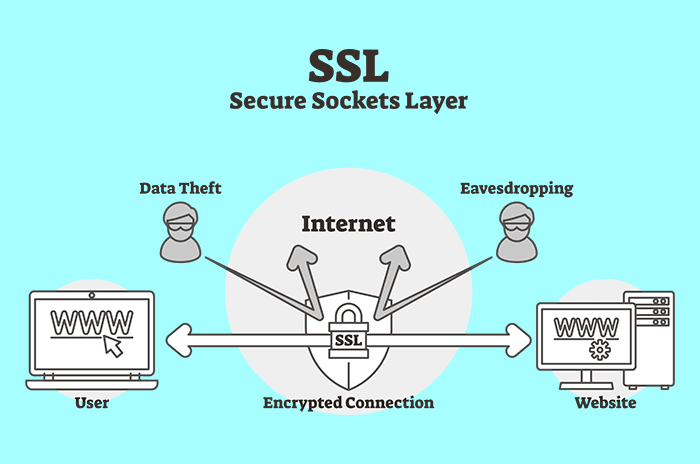
On a website that is “Not Secure,” all of that data is being transmitted in plain text. That means anyone with the right tools and access to the same network as your visitor could potentially intercept and read that data. This type of attack is called a man-in-the-middle attack, and it is one of the reasons why browsers like Google Chrome, Mozilla Firefox, and Safari now flag unprotected websites so visibly.
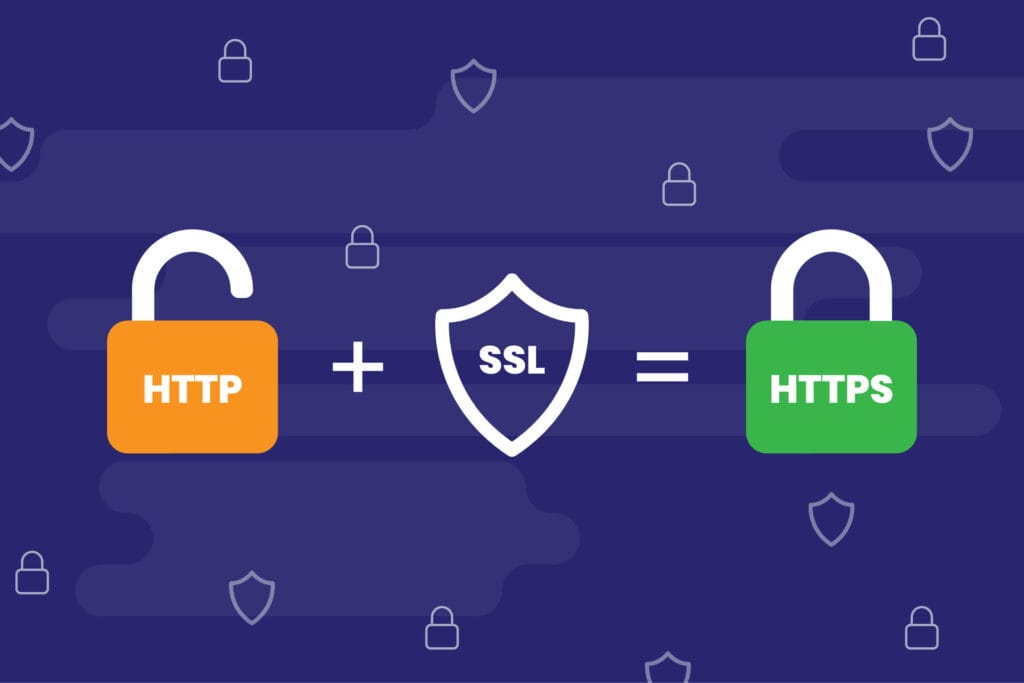
The technical reason your website shows this warning is because it is running on HTTP (Hypertext Transfer Protocol) instead of HTTPS (Hypertext Transfer Protocol Secure). The difference between the two is the presence of an SSL certificate, which encrypts the data being exchanged between your website and your visitors. Without that certificate, there is no encryption, and the browser has no choice but to warn your visitors that the connection is not safe.
Why Fixing This Warning Is Urgent
Some website owners see the “Not Secure” warning and decide to deal with it later. That is a costly mistake, and here is why.
Visitor trust is the first and most immediate casualty of the warning. Studies have shown that a significant percentage of users will leave a website immediately upon seeing a security warning. For e-commerce stores, this translates directly into abandoned shopping carts and lost revenue. For service businesses, it means potential clients clicking away before they ever read a word about what you offer.
SEO rankings are the second major impact. Google has officially confirmed that HTTPS is a ranking signal in its search algorithm. Websites running on HTTPS receive a small but meaningful ranking boost over those still running on HTTP. More importantly, websites that trigger security warnings may eventually be flagged more aggressively by search engines, which can seriously damage your visibility in search results.
Data security is the third concern. Even if your website does not collect payment information, you may have contact forms, newsletter sign-up boxes, or login pages. Any data entered into those forms on an unencrypted connection is potentially vulnerable to interception. Fixing the “Not Secure” warning is not just about appearances. It is about genuinely protecting your visitors.
Step 1: Get an SSL Certificate
The foundation of fixing this problem is obtaining and installing an SSL certificate. An SSL certificate is a small digital file that authenticates your website’s identity and enables the encrypted connection that turns your site from HTTP to HTTPS.
The first thing you should know is that you do not necessarily need to pay for an SSL certificate. Let’s Encrypt is a free, widely trusted certificate authority that provides SSL certificates at no cost to website owners. Most reputable hosting providers have integrated Let’s Encrypt into their platforms and allow you to activate a free SSL certificate with just a few clicks inside your hosting dashboard.
If your hosting provider does not offer a free SSL option, you may want to reconsider your hosting provider entirely, because free SSL is now a standard feature offered by almost every quality host.
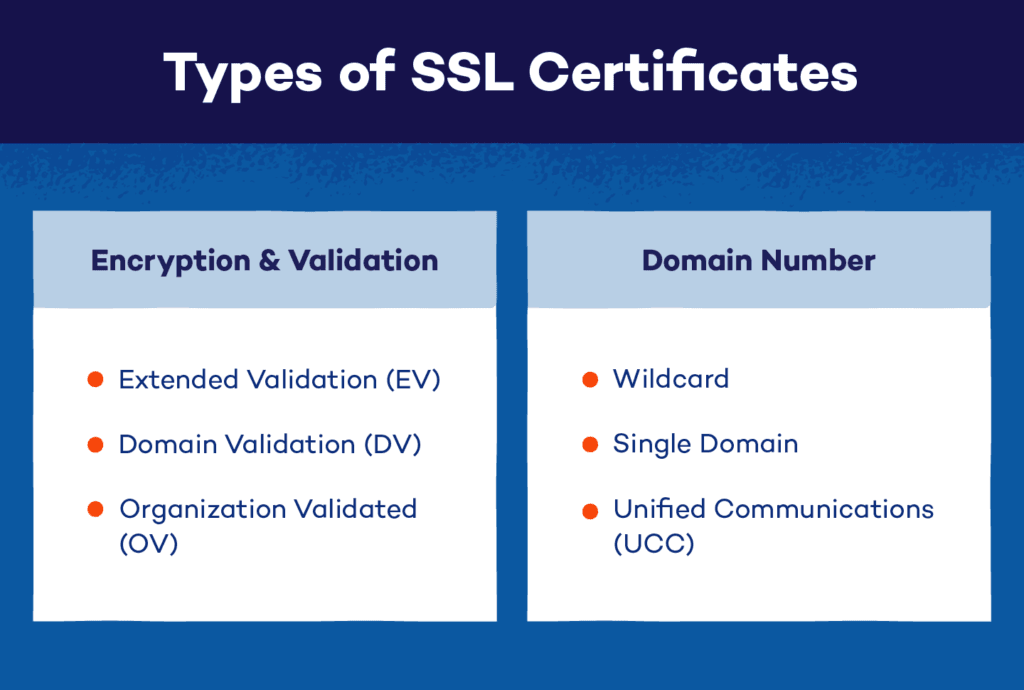
For businesses that need a higher level of identity verification, there are paid SSL certificates available from providers like Comodo, DigiCert, and GlobalSign. These come in different types depending on the level of validation required. A Domain Validation (DV) certificate is the most basic type and simply confirms that you own the domain. An Organization Validation (OV) certificate verifies your organization’s identity in addition to domain ownership. An Extended Validation (EV) certificate offers the highest level of verification and was traditionally associated with the green address bar in browsers, though modern browsers have moved away from displaying that visual differently.
For most small to medium-sized websites, a free Let’s Encrypt DV certificate is perfectly sufficient and completely trusted by all major browsers.
Step 2: Install the SSL Certificate on Your Hosting Account
Once you have your SSL certificate, the next step is installing it on your hosting server. How you do this depends on your hosting provider and the type of hosting plan you are on.
For most users on shared hosting plans with a cPanel control panel, the process is very straightforward. Log into your cPanel, look for the SSL/TLS section, and you will find options to either install a certificate manually or activate a free Let’s Encrypt certificate automatically. Many hosting providers have made this even easier by adding a dedicated SSL section in their dashboard with a single button to enable HTTPS for your domain.
If your hosting provider uses a different control panel such as Plesk or a custom dashboard, the process is similar. Look for an SSL or security section, and follow the instructions to activate your certificate. Most providers have step-by-step guides in their knowledge base specifically for this process.
If you are on a VPS or dedicated server and managing things yourself, you will need to install the certificate through your server’s web server software, which is typically either Apache or Nginx. Both have well-documented processes for SSL certificate installation, and if you are not comfortable doing it yourself, your hosting provider’s support team should be able to assist.
Step 3: Force Your Website to Use HTTPS
Installing the SSL certificate is only half the battle. After installation, your website might still be accessible on both HTTP and HTTPS, which means some visitors might still land on the unencrypted version. You need to force all traffic to use HTTPS automatically.
The most common way to do this is by setting up a 301 redirect from HTTP to HTTPS. A 301 redirect tells browsers and search engines that your website has permanently moved to the HTTPS version, and it automatically sends anyone who arrives at the HTTP version to the HTTPS version instead.
If your website is built on WordPress, the easiest way to set this up is by installing a plugin like Really Simple SSL. This plugin detects your SSL certificate, activates HTTPS across your entire website, and sets up the necessary redirects with minimal configuration required. It is one of the most widely used SSL plugins in the WordPress ecosystem and is trusted by millions of websites.
If you prefer to set up the redirect manually, you can do so by editing your website’s .htaccess file. This file is located in your website’s root directory and controls many of your server’s configuration settings. Adding a few lines of redirect code to your .htaccess file will force all HTTP traffic to automatically redirect to HTTPS. Your hosting provider’s knowledge base or a trusted web development resource can give you the exact code needed for this.
For websites running on Nginx, the redirect is configured in your server’s configuration file rather than .htaccess, but the end result is the same.
Step 4: Update Your Website URL Settings
After you have installed your SSL certificate and set up your HTTPS redirect, you need to make sure your website itself knows that it is now running on HTTPS. If your website’s internal settings still reference the old HTTP address, it can cause a range of problems including mixed content warnings, which we will cover in the next step.
On WordPress, go to your Settings menu, click on General, and check both the WordPress Address (URL) and Site Address (URL) fields. Both of these should now show your website address starting with https:// rather than http://. Update them if they still show the old HTTP address and save your changes.
On other platforms like Joomla, Drupal, or a custom-built website, check your site’s configuration settings or configuration file to update the site URL to the HTTPS version. The exact location of this setting varies by platform, but it is typically found in the general or system settings area of your admin panel.
Step 5: Fix Mixed Content Warnings
This is one of the most common reasons why people install an SSL certificate but still see security warnings in their browser. Even after switching to HTTPS, some elements on your website might still be loading from HTTP addresses. This is called a mixed content issue, and it prevents your browser from showing the fully secure padlock icon.
Mixed content occurs when your webpage is loaded over HTTPS but includes images, scripts, stylesheets, or other resources that are still being called from HTTP URLs. Because those resources are not encrypted, the browser flags the page as not fully secure.
To identify mixed content issues, you can use your browser’s built-in developer tools. Open your website, press F12 to open the developer tools panel, and navigate to the Console tab. Any mixed content warnings will appear here with details about which specific resources are loading over HTTP.
You can also use free online tools like Why No Padlock or SSL Checker to scan your website for mixed content issues. These tools give you a clear list of all the problematic resources that need to be updated.
Fixing mixed content usually involves finding and updating all the HTTP URLs embedded in your website’s content, theme files, widgets, or database. On WordPress, a tool like Better Search Replace can search through your entire database and replace all instances of your old HTTP URL with the new HTTPS version in one operation. This is often the fastest and most thorough way to resolve mixed content issues at the database level.
For images and media files embedded in your content, you may need to go through your pages and posts and re-link or re-upload them so they reference the HTTPS version of their URL.
Step 6: Update All Internal Links and Hardcoded URLs
Even after fixing mixed content through a database search and replace, it is good practice to manually check your website for any remaining hardcoded HTTP links. These are links that have been written directly into your website’s theme files, template files, or custom code rather than being stored in the database.
Check your website’s header, footer, navigation menus, and any custom widgets or page builder elements for links that still begin with http://. Update each one to https:// to ensure your entire website is consistently referencing the secure version of all its resources.
If your website links to external resources like fonts, scripts, or stylesheets from third-party providers, make sure those external resources also support HTTPS. Most major providers like Google Fonts, jQuery CDN, and popular analytics platforms fully support HTTPS, so simply updating the URL from http:// to https:// is usually all that is needed.
Step 7: Update Google Search Console and Google Analytics
Once your website is fully running on HTTPS, you need to update your tracking and webmaster tools to reflect the change. If you do not do this, you may notice discrepancies in your traffic data and miss important messages from Google about your website.
In Google Search Console, add your HTTPS website as a new property if it is not already there. You can add both the HTTP and HTTPS versions as separate properties, but make sure your HTTPS version is set as the primary one. Submit your updated XML sitemap to help Google crawl and re-index your website under its new HTTPS address as quickly as possible.
In Google Analytics, update the default URL in your property settings to reflect the HTTPS version of your website. This ensures that your traffic data is being tracked and attributed correctly, and that sessions on your HTTP and HTTPS pages are not being counted as separate sources of traffic.
Step 8: Set Up SSL Auto-Renewal
One of the most common reasons websites fall back into showing the “Not Secure” warning after fixing it is a forgotten SSL certificate renewal. SSL certificates are not permanent. They have an expiry date, typically 90 days for free Let’s Encrypt certificates and one to two years for most paid certificates.
When your SSL certificate expires, your browser immediately starts showing security warnings again, just as if you never installed the certificate in the first place. For a busy website owner, it is very easy to lose track of an upcoming certificate expiry date, which is why auto-renewal is so important.
Most hosting providers that offer Let’s Encrypt certificates will handle auto-renewal automatically, renewing your certificate before it expires without any action required on your part. Check with your hosting provider to confirm that auto-renewal is enabled for your certificate. If your hosting provider does not handle auto-renewal automatically, set a calendar reminder well in advance of your certificate’s expiry date so you can renew it manually before it lapses.
For paid SSL certificates, the renewal process is typically managed through the certificate provider’s dashboard. Most providers will send you reminder emails as your expiry date approaches, but it is good practice to proactively track your expiry dates rather than relying solely on email reminders.
Step 9: Test Everything After the Fix
After completing all of the steps above, take the time to thoroughly test your website to confirm that the “Not Secure” warning is completely gone and everything is working correctly.
Start by opening your website in multiple browsers, including Google Chrome, Mozilla Firefox, Microsoft Edge, and Safari. Check that the padlock icon appears in the address bar and that the address shows https:// at the beginning. Click through all the major pages of your website to make sure none of them are still triggering warnings.
Use a free online tool like SSL Labs Server Test from Qualys to run a comprehensive analysis of your SSL installation. This tool checks the quality and configuration of your SSL certificate and gives you a letter grade along with detailed feedback. Ideally, you want to achieve an A or A+ rating, which indicates a strong, properly configured SSL setup.
Also check that your 301 redirects are working correctly by typing your old HTTP address into a browser and confirming that it automatically redirects to the HTTPS version. Check both the root domain and a few individual page URLs to make sure the redirect is working across your entire website and not just the homepage.
What to Do If the Warning Persists
If you have followed all of these steps and the “Not Secure” warning is still appearing on some or all of your pages, there are a few additional things to investigate.
First, clear your browser’s cache and cookies and reload your website. Sometimes browsers cache an old version of a page and display outdated security information even after the underlying issue has been fixed.
Second, check whether your hosting server has any configuration issues that might be preventing the SSL certificate from being applied correctly. Contact your hosting provider’s support team and ask them to verify that your SSL certificate is correctly installed and that your server is configured to serve traffic over HTTPS.
Third, check for any third-party scripts or plugins on your website that might be injecting HTTP content into your pages dynamically. Some advertising scripts, social media widgets, or older plugins are known to introduce mixed content issues that are harder to detect through standard scanning tools.
Finally, if your website uses a Content Management System with multiple environments, such as a staging environment and a live environment, make sure that your staging URLs or any development URLs are not being referenced anywhere in your live website’s content or code.
The Padlock Is Just the Beginning
Fixing the “Not Secure” warning and achieving that reassuring padlock icon in your browser’s address bar is an important milestone, but it is just the beginning of building a truly secure website.
Think of your SSL certificate as the foundation of your website’s security, not the whole building. Once you have HTTPS in place, continue building on that foundation with strong passwords, two-factor authentication on your admin accounts, regular security audits, up-to-date software and plugins, and a reliable backup system.
Your visitors trust you with their time, their attention, and sometimes their personal and financial information. That trust is one of the most valuable things your website can earn, and protecting it starts with something as simple as fixing that “Not Secure” warning once and for all.
Do it today, do it right, and your website will be a safer, more trustworthy, and more successful place for every single person who visits it.


You must be logged in to post a comment.