
There comes a point in the life of every growing website or online business when the server that once felt more than adequate starts to feel like it is holding you back. Pages that used to load in under a second now take two or three. Your dashboard shows CPU and RAM usage sitting at uncomfortable highs. Your hosting provider has started sending you resource limit warnings. And during your busiest periods, your website slows to a crawl or goes down entirely.
If any of that sounds familiar, you have most likely outgrown your VPS (Virtual Private Server) and are ready for the next level: a dedicated server. This is not a sign that something has gone wrong. It is actually a sign that something has gone very right. Your business has grown to a point where it needs more power, more resources, and more control than a VPS can offer.
The good news is that scaling from a VPS to a dedicated server does not have to be a stressful, chaotic experience. With the right preparation, the right timing, and a clear step-by-step approach, you can make this transition smoothly and confidently without losing traffic, breaking your website, or disrupting your customers’ experience.
This guide is going to walk you through everything you need to know to make that move as seamlessly as possible.
Understanding the Difference Between VPS and Dedicated Server
Before jumping into the migration process, it helps to clearly understand what you are moving from and what you are moving to.
A VPS is a virtualized portion of a physical server. While you get dedicated resources that are allocated specifically to your account, you are still technically sharing the underlying physical hardware with other users. A hypervisor, which is the software that creates and manages virtual machines, divides the physical server into multiple isolated environments. Your VPS is one of those environments. You get your own slice of the server, but the physical machine itself is shared.
A dedicated server is an entirely different situation. You are not sharing anything with anyone. The entire physical machine, every processor core, every gigabyte of RAM, every storage drive, is yours and yours alone. There is no hypervisor overhead, no resource contention with neighboring users, and no virtual layer between your applications and the raw hardware. This translates directly into better performance, greater stability, and significantly more control over your server environment.
Understanding this difference helps you appreciate why the move to a dedicated server is such a meaningful upgrade, and why it requires careful planning rather than a simple click of a button.
Recognizing the Right Time to Make the Move
One of the most important questions in this whole process is knowing when to make the switch. Moving too early means spending money on resources you do not yet need. Moving too late means your website is already suffering and your customers are already feeling the pain.
There are several clear signals that tell you the time has come to upgrade from a VPS to a dedicated server.
The first and most obvious signal is consistently high resource usage. If your CPU utilization is regularly sitting above 80% or your RAM is frequently maxed out, your VPS is running at its limits. Occasional spikes are normal, but sustained high usage means your current server simply does not have enough capacity for your workload.
The second signal is performance degradation during peak hours. If your website slows down noticeably during busy periods, it is a sign that your VPS cannot handle the load you are putting on it. For an e-commerce store or a SaaS application, this kind of performance inconsistency directly impacts your revenue and user satisfaction.
The third signal is security and compliance requirements. As your business grows, you may start handling more sensitive customer data, processing more financial transactions, or operating in industries that require specific data privacy and compliance standards. A dedicated server gives you complete control over your security environment in a way that a VPS simply cannot match.
The fourth signal is when your VPS upgrade options have run out. If you are already on the highest tier VPS plan your provider offers and it is still not enough, a dedicated server is the natural next step.
Choosing the Right Dedicated Server for Your Needs
Not all dedicated servers are the same, and choosing the right one requires a clear understanding of your current and future needs. Buying too little means you will be back in the same situation sooner than you would like. Buying too much means overpaying for resources that sit idle.
Start by analyzing your current VPS resource usage in detail. Look at your average and peak CPU usage, your RAM consumption, your storage requirements, and your bandwidth usage. These numbers give you a baseline from which to calculate how much more you need.
As a general rule, when moving to a dedicated server, aim for a configuration that comfortably handles your current peak usage while leaving significant room for growth. If your VPS is maxing out at 8GB of RAM during peak hours, do not buy a dedicated server with 16GB. Buy one with 32GB or more, because your business needs will continue to grow after the migration.
Pay close attention to the processor you choose. Dedicated servers typically use enterprise-grade processors from Intel or AMD, and the right choice depends on your workload. If your website or application is CPU-intensive, look for processors with high clock speeds and more cores. If your application relies heavily on database operations, RAM and fast storage often matter more than raw CPU power.
Storage type and configuration is another critical consideration. SSD storage is significantly faster than traditional HDD storage and is the right choice for virtually any modern web application. For maximum reliability and performance, consider a RAID configuration that spreads data across multiple drives, providing both speed benefits and protection against data loss if a single drive fails.
Finally, choose a hosting provider that offers managed dedicated server options if you are not comfortable managing a server yourself. A managed server means the provider takes care of security patches, software updates, server monitoring, and basic maintenance on your behalf. This lets you focus on your business rather than your infrastructure.
Planning the Migration in Detail
A successful migration from VPS to dedicated server starts long before any files are transferred. The planning phase is where you lay the groundwork for a smooth transition, and skipping it is one of the most common reasons migrations go wrong.

Start by creating a complete server inventory of your current VPS. Document every piece of software installed on your server, including your operating system and its version, your web server software (such as Apache or Nginx), your database management system (such as MySQL or MariaDB), your programming language versions (such as PHP, Python, or Node.js), and any other services or tools your applications depend on.
This inventory serves as your blueprint for setting up the new dedicated server. Your goal is to replicate your VPS environment on the dedicated server as closely as possible before transferring any data or pointing any traffic at the new machine.
Next, establish a clear migration timeline with specific milestones. Identify a low-traffic window, typically late at night or during early morning hours on a weekday, as your target migration time. Inform any team members or stakeholders who need to know that maintenance will be taking place.
Set up a staging environment on your new dedicated server before the actual migration begins. This allows you to install all the required software, test your applications, and identify any compatibility issues without affecting your live website.
Backing Up Everything Before You Begin
This step is so important that it deserves its own dedicated section: back up everything before you touch anything.
Before you start the migration process, create a complete and verified full server backup of your VPS. This means backing up all your website files, all your databases, all your email accounts and data, all your configuration files, and any custom scripts or tools you have installed.
Store your backup in multiple locations. Save a copy on your local computer, upload one to a cloud storage service like Amazon S3, Google Cloud Storage, or Backblaze B2, and if possible, keep a copy on your new dedicated server as well before you begin the migration. Having multiple copies in multiple locations means that no matter what goes wrong, you always have a way to get back to where you started.
Verify your backups before proceeding. Do not assume that because a backup process completed without errors, the backup is valid. Actually open the backup files, check that the databases can be imported successfully, and confirm that your critical files are all present and intact. A backup you have never tested is a backup you cannot fully trust.
Setting Up and Configuring Your New Dedicated Server
With your backup secured and your server inventory in hand, it is time to set up your new dedicated server. This is one of the most technically involved parts of the process, and it is where having a clear plan makes all the difference.
Start by choosing and installing your operating system. Most web servers run on a Linux distribution such as Ubuntu Server, CentOS, AlmaLinux, or Debian. Choose the same distribution and version that your VPS was running unless you have a specific reason to change. Keeping the operating system consistent reduces the risk of compatibility issues with your existing applications.
Once the operating system is installed, begin installing and configuring your server software stack. This typically includes your web server software such as Apache or Nginx, your database server such as MySQL, MariaDB, or PostgreSQL, and your scripting language runtime such as PHP, Python, or Node.js. Install the same versions that your VPS was running unless newer versions are required or recommended for your applications.
Configure your server security settings early in the setup process. This includes setting up your firewall using tools like UFW or firewalld, disabling root login via SSH, configuring SSH key authentication instead of password-based login, and installing a security monitoring tool to watch for suspicious activity.
If your website uses a control panel such as cPanel, Plesk, or DirectAdmin, install and configure it on the new server at this stage. Make sure the control panel version is compatible with your applications and that all your domain, email, and hosting settings are properly configured before you begin transferring data.
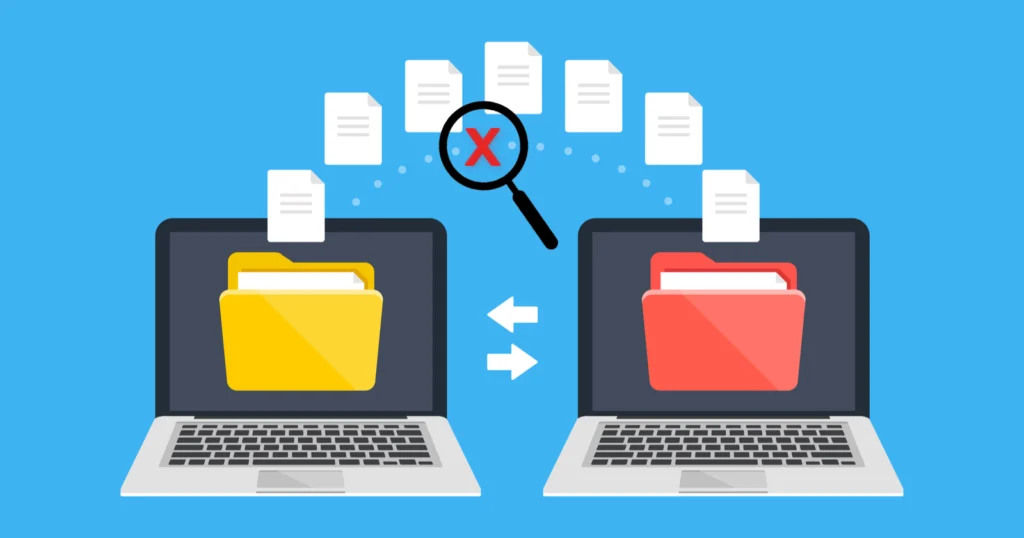
Transferring Your Data to the Dedicated Server
With the server environment set up and tested, you are ready to transfer your data. This is the core of the migration, and doing it carefully and methodically is essential.
The most efficient way to transfer large amounts of data between servers is using rsync, a powerful command-line tool that synchronizes files and directories between two locations. Rsync is particularly useful because it can transfer only the files that have changed since your last sync, which makes it ideal for doing an initial bulk transfer followed by a final sync just before you go live on the new server.
For your databases, use mysqldump to export your databases from the VPS as SQL files, then import them into your database server on the dedicated server using the MySQL command-line interface or a tool like phpMyAdmin. After importing, verify that all tables are present, all data looks correct, and there are no import errors before moving on.
Transfer your configuration files carefully, reviewing each one to make sure any file paths, database credentials, or server-specific settings are updated to reflect the new server’s environment. A configuration file that works perfectly on your VPS may contain hardcoded paths or credentials that need to be updated for the dedicated server.
After the initial data transfer is complete, run a second rsync pass to catch any files that were created or modified during the transfer process. This ensures that your dedicated server has the most up-to-date copy of your data possible.
Testing Everything Thoroughly Before Going Live
Never go live on a new server without thorough testing. This is the step that separates smooth migrations from chaotic ones.
Use a hosts file edit on your local computer to point your domain to the new dedicated server’s IP address without changing your public DNS settings. This allows you to browse your website exactly as it will appear on the new server, while your live website continues running on the VPS for everyone else.
Go through your website systematically. Test every page type: home page, product pages, blog posts, landing pages, and any custom page templates. Test all interactive functionality including contact forms, login systems, checkout processes, search functions, and any API integrations your website relies on.
Check your error logs on the new server for any warnings or errors that appear during your testing. Even if a page looks correct to the eye, errors in the logs can indicate underlying problems that will cause issues later. Address every error you find before proceeding.
Test your website’s performance on the new dedicated server using tools like GTmetrix or WebPageTest. You should see a noticeable improvement over your VPS performance. If the speeds on the new server are similar to or worse than your VPS, there may be a configuration issue that needs to be resolved before going live.
Updating DNS and Going Live
When you are satisfied that everything on your new dedicated server is working perfectly, it is time to make the switch official by updating your DNS settings.
Log into your domain registrar account and update your domain’s A record or nameservers to point to the IP address of your new dedicated server. Before making this change, lower your TTL (Time to Live) value to a small number, ideally around 300 seconds or five minutes, at least 24 hours in advance. This ensures that the DNS change propagates across the internet as quickly as possible after you make it.
Understand that DNS propagation is not instant. Even with a low TTL, it can take anywhere from a few minutes to several hours for all visitors around the world to be directed to your new server. During this window, some visitors will land on your old VPS and some will land on your new dedicated server. Both should be fully functional, so this period should be invisible to your users.
Keep a close eye on both servers during the propagation window. Watch your server monitoring tools for any unusual activity, check your error logs for new issues, and stay available to respond quickly if anything unexpected comes up.
Keeping Your VPS Active During the Transition Period
Do not cancel your VPS the moment your DNS update is done. Keep it running and fully operational for at least two to four weeks after the migration is complete.
During DNS propagation, some visitors will still be hitting your old VPS. Keeping it active ensures they have a working website to land on. Beyond propagation, your VPS serves as a safety net during the early weeks on your new dedicated server. If a critical issue is discovered on the new server that cannot be resolved quickly, you can redirect traffic back to the VPS while you fix the problem, with no disruption to your users.
Use this transition period to monitor your new dedicated server closely. Watch your CPU and RAM usage, track your page load times, review your uptime monitoring data, and check your website analytics to confirm that traffic levels are normal and no unusual patterns are emerging.
Once you have run on the dedicated server for two to four weeks with no major issues, you can confidently cancel your VPS plan knowing that your new server has proven itself stable and reliable.
Optimizing Your Dedicated Server After Migration
Moving to a dedicated server is not the end of the journey. It is the beginning of a new phase where you have the power and flexibility to optimize your server environment in ways that simply were not possible on a VPS.
Start by configuring server-level caching to maximize your website’s performance. Tools like Redis or Memcached can dramatically reduce database load by storing frequently accessed data in memory, allowing your server to serve requests much faster. Varnish Cache can be set up as a reverse proxy in front of your web server to cache entire pages and serve them with almost zero processing overhead.
Configure your database server for optimal performance. MySQL and MariaDB have a wide range of configuration options that can dramatically improve query speed and overall database efficiency when properly tuned for your specific workload. Consider using a database performance monitoring tool to identify slow queries and optimize them.
Set up comprehensive server monitoring using tools like Prometheus, Grafana, Netdata, or Zabbix. These tools give you real-time visibility into every aspect of your server’s performance, from CPU and memory usage to disk I/O and network throughput. Having this visibility means you can spot potential problems before they affect your users.
Review and harden your server security configuration now that you have the environment fully set up. Conduct a thorough security audit, remove any unnecessary software or services, configure automated security updates for your operating system and software packages, and set up intrusion detection tools to alert you of any suspicious activity.
Building a Long-Term Server Management Strategy
Successfully migrating to a dedicated server is a significant achievement, but it also comes with greater responsibility. Unlike a VPS where your provider handles much of the underlying infrastructure, a dedicated server, especially an unmanaged one, requires you to take an active role in its ongoing maintenance and management.
Establish a regular server maintenance schedule that includes applying security patches and software updates, reviewing and rotating log files, checking disk usage and clearing unnecessary files, verifying that automated backups are running correctly and that backup files are valid, and reviewing security audit logs for any signs of unauthorized access attempts.
Build a clear disaster recovery plan that documents exactly what you would do in the event of a serious hardware failure, a security breach, or a catastrophic data loss event. Knowing in advance what steps to take and in what order means you can respond quickly and calmly if something goes wrong rather than scrambling to figure it out in the middle of a crisis.
Consider investing in a server management panel or working with a managed hosting provider if the technical demands of running a dedicated server feel overwhelming. There is absolutely no shame in getting expert help to manage your infrastructure. In many cases, it is the smartest business decision you can make, because it frees you to focus on growing your business while professionals handle the technical details of keeping your server healthy.
You Have Outgrown the VPS and That Is Something to Celebrate
Scaling from a VPS to a dedicated server is a milestone that many website owners and business operators dream about reaching. It means your business has grown, your traffic has increased, and your ambitions have expanded beyond what a virtual server can accommodate.
The transition does not have to be frightening or complicated. With thorough planning, careful preparation, comprehensive testing, and a methodical approach, you can move from your VPS to a dedicated server without losing a single visitor, breaking a single page, or missing a single sale.
On the other side of this migration, you will have a server environment that is faster, more powerful, more secure, and more capable of supporting your growth than anything you have had before. That is not just a technical upgrade. It is a foundation for the next chapter of your business.
Take your time, follow the steps, and make the move with confidence. Your dedicated server is ready and waiting.


You must be logged in to post a comment.